Saturday, 18 August 2018

Tofu Scramble Breakfast Burrito.


I first discovered the magic of a tofu scramble in, of all places, South Korea. There was this one lovely little cafe, called Plant (which I'd strongly suggest visiting for anyone in Seoul), that my friend and I visited at least 5 or 6 times in as many days. The food was LIT. However most lit of all the food, was the breakfast burrito. It was so good that I dreamed about it, more than once. In actual fact, I still dream about it...

I knew that theoretically you could crumble firm tofu, add in a few things and that you'd supposedly end up with something resembling scrambled eggs, albeit vegan. What I could not have anticipated however, was just how straight out TASTY and also conveniently easy doing that would be. Which leads us to the present situation, wherein I am entirely unashamedly obsessed with eating tofu scramble for breakfast, preferably in the form of a breakfast burrito but truthfully, this scramble would go down equally as tasty on some toasted bread. Aside from just being generally delicious, tofu scramble also makes for a really wholesome and filling breakfast that will leave you genuinely feeling full until lunch, instead of getting the dreaded 10.30am munchies where you feel the compulsion to eat everything in sight (we've all been there). Also, it keeps well in the fridge and reheats the following day, which is like a gift for the mornings where I have to be up early for work and don't have time, with my demanding sleeping schedule, to make a proper breakfast. Simply reheat some tofu scramble, put it in a soft tortilla with some other fun things (namely avocado and coriander) and voila - eat well AND be at the office on time!


Ingredients;

(*this makes enough to serve 3, because I like keeping some as leftovers for breakfast the following days too!)

450gm firm tofu
1/2 red onion, finely diced
1/3 leek, finely sliced (optional, but v tasty)
1/3 red capsicum, cut into thin strips
1 -2 tbsp olive oil
2 - 3 handfuls spinach
2 shallots, sliced

1 tsp garlic salt
1/2 tsp paprika
1/2 tsp turmeric
1/4 tsp chilli flakes
1/2 tsp cumin
Pepper (to taste)
Water
1 tbsp soy sauce/tamari

1 handful vegan cheese (optional)

Soft tortillas
Coriander
Sliced fresh tomato
Avocado

1. Remove your tofu from the packaging. You need to remove some of the moisture from the tofu - to do this I like to take 2 bread boards and place some paper towel/absorbent paper on top of one. I then crumble the tofu with my hands and spread it over the top of that paper towel. I add another layer of paper towel on top, followed by the second bread board and then a hefty stack of law textbooks (the only thing they've ever been useful for is as a tofu press to be entirely honest!). I leave this setup for approx. 10 mins while I prep the other ingredients.
2. While that's going on, dice and slice the onion, capsicum, shallots and leek.
3. Take a large frypan and place it over medium-to-high heat. Add the olive oil to the pan, then add the onion, leek and capsicum. Cook for a few minutes, then add in the spinach and stir through.
4. Push the vegetables over to one side of the pan and the take your now semi-dry crumbled tofu and add it to the empty side. Allow to cook for approx. 5 minutes, stirring occasionally, then mix through with the veggies already in the pan.
5. Take a small bowl and add your spices to it. Add in some water, approx. 2 tbsp and mix well. Add in some cracked black pepper to taste.
6. Add the spice sauce mix to the tofu and veg mix. Add in the soy sauce/tamari and mix everything through well. I like to add a handful of vegan cheese at this stage for some extra pizzaz but that's entirely up to you! Stir everything through well and voila - you've got yourself a tofu scramble!

To serve, take a soft tortilla and layer it up with some of the tofu scramble mix, some fresh coriander, sliced tomato and avocado. Fold it all up and then proceed to enjoy one of the most delicious breakfasts of your life. MAGIC!


Sunday, 12 August 2018

Rocket Toppa.


I grew up in a small town in regional Australia that has a very large Italian population. Aside from fostering an environment wherein we all, Italians and non-Italians alike, love to gesture enthusiastically with our hands when we talk, this large Italian population bestowed upon we townsfolk a great and mighty gift; Italian cuisine.

Sure, you can pretty much get 'Italian food' anywhere and everywhere these days, but let me tell you, there's Italian food and then there's actually good Italian food. I myself am a big fan of the latter, and courtesy of my upbringing in this delightfully Italian influenced little town, I have exceptionally high standards when it comes to that good Italian food. The Italian food in my hometown is mindblowingly good. Even today, generations after many of the first Italian migrants moved to the town, you can still find restaurants serving nonna's traditional lasagne recipe and my god is that one heck of a flipping lasagne!

There are lots of Italian restaurants in this mini-Italy hometown of mine, all of which are exceptional, however for reasons largely unclear to me, my family (N.B. my dad) have always had our favourite. And at the favourite restaurant there is a family favourite dish humbly known as the 'rocket toppa.' It's a very simple dish, which is probably what makes it so great and I'm yet to ever eat at this restaurant and not have a rocket toppa. Traditionally it comes with proscuitto (a kind of Italian ham that's thinly sliced), which is obviously not very vegan friendly, but I'm pleased to report that the humble rocket toppa still tastes absolutely spectacular without. For my interpretation, I added in some semi sundried tomatoes in the place of the traditional proscuitto in order to keep an additional level of flavour within the pizza as a whole.

My biggest tip for this dish is to get a good quality pizza base, also known as a 'toppa' because it plays a starring role in the dish. Add in some fresh rocket (arugula for all the Americans out there!) and some vegan parmesan and you friends, have a recipe for a damn tasty time!!


Ingredients;
1 large pizza base
8 large tomatoes, chopped into quarters
2 tsp raw sugar
Pinch salt
Cracked black pepper
Extra virgin olive oil

1 cup (approx.) semi sun-dried tomatoes (I use oil free ones from the same isle in the supermarket as the canned veg)
1 handful fresh basil, roughly chopped

2 cups fresh rocket (arugula)
2 tbsp vegan parmesan (I use 'Green Vie' available at The Cruelty Free Store in Aus)
1 tbsp balsamic vinegar
1 tbsp extra virgin olive oil
1/4 red onion, very finely sliced into half-moons

1. Preheat an oven to 180 degrees fan-forced.
2. Take a lined baking tray and place your quartered tomatoes on it. Sprinkle over the raw sugar along with some salt and pepper, then a generous amount of olive oil. Mix the tomatoes around well then bake for approx. 30 mins.
3. When your tomatoes are roasted, remove them from the oven (leave the oven on though!) and transfer them into a fine sieve/colander. Place a bowl underneath then use a fork to mash the tomatoes, leaving a delicious paste in the bowl below.
4. Take a large pizza base and place it on an oven tray. Use a spoon to spread your homemade tomato paste generously over the base. Finely slice the sun-dried tomatoes and then sprinkle them, along with the finely sliced basil, over the pizza base.
5. Place the pizza in the oven to cook for approx. 10 mins. The base should start to go crispy, but make sure you remove the pizza before the tomatoes on top start to burn!
6. While the pizza is cooking, take a large bowl and combine the fresh rocket, vegan parmesan, balsamic vinegar, olive oil and finely sliced red onion. Mix them through together until well combined.
7. When your pizza is cooked, remove from the oven, cut into pieces and then serve each piece topped with a generous handful of the rocket mixture (plus some extra parmesan if you're cheeky)! Enjoy!!


This dish was inspired by a dish of the same name available at La Scala Restaurant in Griffith, NSW. If you're ever in town, I'd recommend trying it! The restaurant will make it vegan upon request (make sure to tell them you want both the proscuitto and cheese removed). Alternatively just make my version, because truthfully I think it's possibly even better than the one that inspired it!!


Monday, 2 July 2018

Travelling in Uzbekistan.

I've wanted to travel to Uzbekistan for years. It's long been a bucket-list destination for me, but for a myriad of different reasons, I could never quite get there until now. The great news is that it's never been a better time to visit Uzbekistan. There has been a lot of positive government reform in the last two years, meaning the country is opening itself and all it's hidden gems to the world. Previously logistical matters, like visas and local currency, were notoriously difficult to obtain, but no more. The result is that more people are visiting Uzbekistan, which is expanding and improving their tourism industry. The biggest benefit though, is that at the moment Uzbekistan is still relatively 'undiscovered' in the sense that it is not yet overcrowded or over-commercialised. It's one of the few places I've been that felt really and truly genuine - somewhere that I could experience and feel like I was the only non-local there, seeing a life and a culture so very different from my own for the first time. There are some tourists in Uzbekistan, but few enough that the country's sights, cities, restaurants and roads are relaxed, uncrowded and, particularly regarding the sights, beautifully serene and quietly magical. 

Uzbekistan skyrocketed to take the cake for the very best place I've been. It was a combination of many things, though notable mentions must go to the incredibly welcoming and friendly Uzbek people and the otherworldly architecture of the ancient cities, for making Uzbekistan so special. It's difficult to capture the complete magnificence, the magic, the sheer, undiluted beauty, of the country, though I do think my pictures speak louder than words in attempting to convey, at least in part, some of the reasons why you absolutely must add Uzbekistan to your own travel bucket lists. I had the time of my life travelling in Uzbekistan and I hope that my images and words help convince you that the very best decision you could make in your life right now would be to book yourself some plane tickets to this magical country as soon as possible!

Wandering in the Registan, Samarkand.
Where is Uzbekistan?
Uzbekistan is located in the very heart of the world, right in the middle of Eurasia. It shares borders with Kazakhstan, Kyrgyzstan, Tajikistan, Afghanistan and Turkmenistan. All those neighbouring countries are landlocked, meaning that Uzbekistan is one of just two double-landlocked countries in the world (the other is Liechtenstein, just in case that ever comes up in trivia someday in your life)!

Basically Uzbekistan is located somewhere in the middle between China and Turkey and Russia and India. It was formerly the very heart of the great Silk Road, a testament to it's central location in the heart of the world's largest landmass, Eurasia. Nowadays it's a bit of an off-the-beaten-track gem of a place which isn't necessarily the quickest or easiest place to get to, but my oh my does it well and proper deliver the goods for adventurous tourists like myself (and hopefully you too)!

How do I get there?
Naturally, this depends on where you're coming from, but chances are you'll fly into the Uzbek capital, Tashkent! 

From Australia, I flew to Seoul, South Korea and stayed there for a few days (during which I also got my visa direct from the Uzbek embassy in Seoul), and then I flew direct from Seoul to Tashkent, Uzbekistan. I did the exact same trip in reverse on my way home, again stopping for a few days in Seoul. If you're flying from Australia/New Zealand, or somewhere in Asia, I'd recommend this flight path via Seoul.

If you're flying from Europe, there are a few direct flights from the major European hubs, namely London Heathrow, Paris and Frankfurt (among others), with Uzbekistan Airways. These direct flights are decently priced, though I believe that Uzbekistan Airways don't provide any inflight entertainment, so be prepared. Alternatively, there are lots of flights between Istanbul-Ataturk Airport and Tashkent each day, so it's a good point of connection into Uzbekistan.

From the Middle East, there are direct flights via Dubai, or alternatively via Istanbul.

From North America, you can either fly in via Seoul, or come the other way via Europe/Istanbul. 
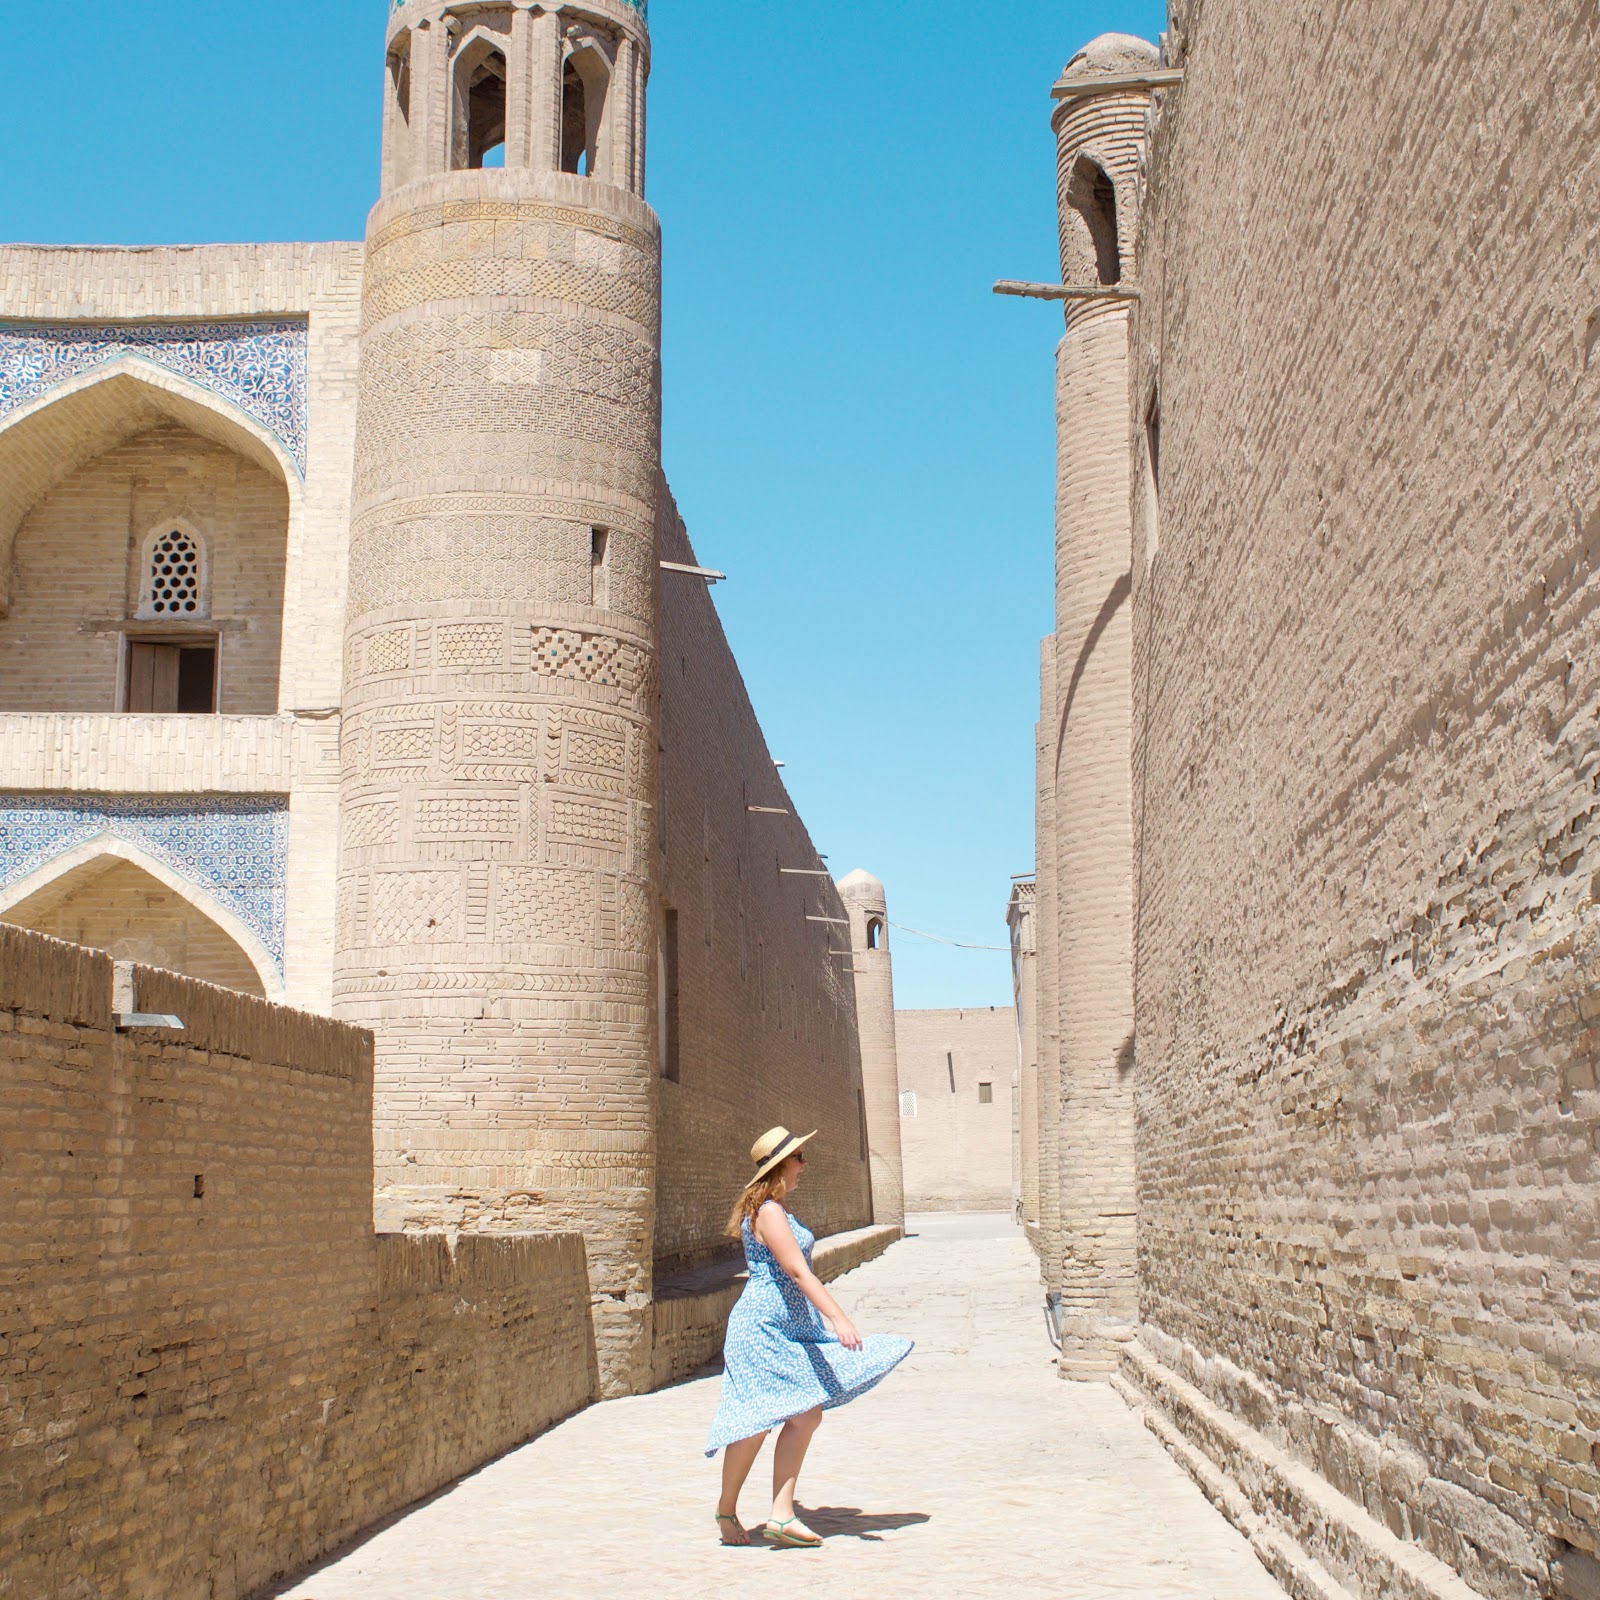
Twirling around in the walled inner old city, Khiva.
Bukhara's Kalyan Minaret, which Genghis Khan once ordered be spared as he was particularly taken with it's beauty.
Details from the exterior of Gur-e-Amir, Samarkand.
Should I travel with a tour or freestyle it?
I personally travelled with a tour, G Adventures, and I genuinely LOVED it. Because of that, I'd absolutely recommend the tour to everyone and anyone. The itinerary was 11/10, my guide was literally amazing and it was nice to share the experience with old and new friends. However probably the biggest bonus in doing a tour was language. Most Uzbek people speak their national language, Uzbek, in addition to Russian (and in some places, also Tajik). English is not very widely spoken or  understood (though this is slowly changing), so it was somewhat difficult to get around if you didn't have at least conversational Russian. My guide spoke Russian fluently and she was a literal godsend, particularly when it came to sourcing vegetarian/vegan food. Uzbekistan is a very safe country and the locals are all super, SUPER friendly, so you could absolutely freestyle it while there, but having a Russian-speaking tour guide was more beneficial than I could have realised, so if you're not so great at speaking and understanding Russian (or Uzbek!), my personal recommendation would be to go for a tour. 

A traditional yurt camp, somewhere remote in the Eurasian steppe between Samarkand and Bukhara.
Po-i-Kalan, Bukhara. This building is the only functioning madrassah left in Bukhara. 
A magnificent golden sunset over the soft rolling hills of the remote and vast Uzbek desert.
What are the must-see cities and sights?
Chances are you'll arrive in the capital city, Tashkent. It's a very clean, very organised city (unexpectedly so!), but the real sights of Uzbekistan are found to the south-west of the city in the heartland of the Silk Road. You absolutely CANNOT miss visiting Samarkand and Bukhara, and I'd strongly suggest making the effort to go out west to Khiva as well. All three of these cities were vital points on the Silk Road and they each have spectacular histories, sights and cultures to be discovered. I also spent a night in a desert yurt camp, which was a very fun, novel and interesting experience. If you've the time, I'd also suggest seeing if you can find such an experience, though this could be difficult if freestyling things rather than group travelling. 

You cannot, as in please DO NOT, miss visiting a few very notable places including;

     - The Registan, Samarkand (I'm still in awe over this place, and likely will be forever)
     - Gur-e-Amir Mausoleum, Samarkand (seriously impressive exterior and interior)
     - Shah-i-Zinda, Samarkand (a complex of mausoleums with utterly spectacular mosaics)
     - Po-i-Kalan, Bukhara (an Islamic complex home to Bukhara's only functioning madrassah)
     - Kalyan Minaret, Bukhara (located in Po-i-Kalan, this is the tallest minaret in Uzbekistan)
     - Samanid Mausoleum, Bukhara (an incredible example of early Islamic architecture)
     - Ark/Fortress, Bukhara (includes the old city walls and palace of the former rulers of the city)
     - Bolo Haouz Mosque, Bukhara (amazing exterior with impressive wooden supports)
     - Laub-i-Hauz, Bukhara (large central square around a waterhole and excellent place for a coffee)
     - Ichan Kala, Khiva (the ancient walled old city with over 50 monuments within the walls)
     - Kalta Minor, Khiva (a minaret with really impressive mosaic tiling) 
     - Tash Khauli, Khiva (a former palace and the apartments of the ruler)
     - Watchtower, Khiva (come here at sunset for impressive views over the old city)

These are just a few of the beautiful sights to be seen in Uzbekistan. While I strongly suggest a visit to all of the above, I also recommend simply losing yourself in the cities of the ancient Silk Road and wandering somewhat aimlessly through the streets of them as a means to experience everyday life in Uzbekistan and also because the magic of this country is not merely found in it's sights alone, but also simply through the act of being a part of the day-to-day life of the country and it's people.

Gur-e-Amir, Samarkand softly lit up at Golden Hour. This is a mausoleum complex with one of the most impressive mosque interiors I've ever seen!
Kalta Minor and the quiet backstreets of Ichan Kala, Khiva.
The minarets and mosque domes of Khiva as viewed from the watchtower at sunset.


Where should I stay?
All my accommodation was organised through my tour, but we stayed in some super fun places that I'd recommend to people anyway (despite me not actually being the one responsible for finding and booking them!). 

In Bukhara we stayed at a really lovely family operated hotel called "As-Salam" which was absolutely brilliant and somewhere I'd stay again in a heartbeat! It was superbly located in the old city which made walking everywhere very easy and the rooms were really beautifully decorated with traditional artworks. Internet access was also good here (the same cannot be said for a lot of places in Uzbekistan unfortunately!) 

In Khiva we also stayed at a lovely little boutique hotel called "Shaherezada" which was again located within the old city (inside the old fortress walls to be exact - very fun)! It was also beautifully decorated and furnished and also had an excellent location.

Alternatively, there are a surprising number of accommodation options throughout Uzbekistan that can be booked through all the typical hotel booking sites. I'd really recommend trying to find small, boutique family run places because they're generally much friendly, welcoming and provide a much better insight into the beautifully friendly Uzbek hospitality than larger, international options could ever give. Generally accommodation is super affordable and you can find options you'd typically likely consider outside you're budget to actually be a very affordable price! If you're there in the summer, would STRONGLY suggest finding somewhere with airconditioning (lest you literally and figuratively melt - desert heat is not to be taken lightly, which as Australian, should warn you that when it's hot, it is through and through legit HOT!). 

Some of the many BEAUTIFUL Uzbek locals, who are absolutely the most friendly group of people I have ever had the joy of encountering anywhere in this world!
Inside Gur-e-Amir, Samarkand. This ceiling is gold plated and it's beauty was entirely beyond belief.
Bukhara's Po-i-Kalan complex, viewed from a terrace cafe across the square while enjoying some green tea.
Any suggestions on clothing?
Uzbekistan is a secular country, however the dominant religion is Islam and the influence Islam has on society is fairly obvious. The Uzbek's however, largely take a 'relaxed' approach to Islam, and the country was definitely far less conservative than I was expecting. When visiting the major historical sites, chances are there'll also be a mosque, in which case you should cover your knees and shoulders (regardless of gender). There was only one mosque in Tashkent that required women to cover their heads with a scarf. Most days I wore a t-shirt and some lightweight cotton pants or a jumpsuit, so I generally covered my knees and shoulders the majority of the time which was less a requirement and much more so a way for me to extend my respect to the Uzbek culture and people. It also served as excellent sun protection, which was rather important given the full sun and desert heat we experienced the whole time I was in Uzbekistan. There were a few times though that I wore shorts or a sleeveless top and that was not a problem at all either. 

In the summer months, Uzbekistan is HOT, so you'll want lightweight clothing. Conversely, in the winter, it is very cold, so layer up. Overall though, there wasn't anything particularly special about the clothing you should or should not wear in Uzbekistan.

Inside one of the madrassah's in the Registan, Samarkand.

Genuinely gazing in wonder at the mosaic details on the facade of a former mosque in Bukhara.
Sheep resting in the midday sun on the shores of Ayudar Lake. These guys are a common sight across Uzbekistan.
What about the food?
Ahhhhh the food. Always my biggest source of questions when visiting somewhere new.

First things first, Uzbeks eat a lot of meat. Like, A LOT of meat. Meat is everywhere, in relatively large quantities, and from what I'm told, it's fairly tasty. I was led to believe prior to my departure, courtesy of some Internet research, that because of this meat-frenzy the Uzbek's have, that being vegan, or even vegetarian, was going to be literal mission impossible. As it joyously turned out, that assumption was VERY wrong.

In Uzbekistan they grow and produce the majority of their own food, meaning that fresh produce is widely available and oh my is it mighty delicious fresh produce too! The tomatoes in Uzbekistan deserve a very honourable mention because they were hands down the tastiest I have eaten anywhere. They make a lot of fresh salads that Uzbeks typically eat as sides to their meals, though if you go to town and order a selection of these, you can made them a proper meal. I really liked the tomato salads (generally made with super delicious fresh tomatoes, cucumber, onion, peppers and lots of fresh dill - VERY tasty), the cabbage salads, eggplant salads, cauliflower salads, carrot salads - basically all of the salads with all of the vegetables were extremely tasty! 

Specifically concerning vegetarian/vegan food, there was generally always the option of vegetable 'shashlik' which is essentially a stick of grilled veggies. I often had shashlik with a side of rice or potato fries (the latter less traditional, but carbs are life) and some kind of salad. I could also, by asking through my guide, often get potato 'manti' which are traditional Uzbek steamed dumplings. Usually manti come filled with meat, or in the autumn pumpkin, but if we asked they were often happy to make a vegan potato version. Unfortunately the Uzbek national dish, plov, which is a kind of fried rice, is made using meat, so it was something I couldn't try. Plov was probably the only food item off limits to this vegan, with most other types of food customisable to make them meat-free, which was great!

In terms of drinks, I strongly suggest drinking lots of iced tea and homemade lemonade because both are very tasty and popular drinks available in most places. If you drink, there is a lot of vodka in Uzbekistan (thanks to their Soviet history) and my experience was that the locals will gladly share some shots and a few too many toasts to things as varied as 'friendship between nations' and 'prosperous harvests' with you when they spot you out and about at dinner! They're all super friendly though, and I really suggest taking up the offer to celebrate with locals if they invite you to do so! Also, there is some locally produced Uzbek wine and the white wine I had was delicious, so I'd also recommend trying some if you can at a restaurant! 

In Uzbekistan they largely make all of your food fresh after you order. This makes eating out a bit of a different experience and means that meal times can be very long and drawn out affairs. When eating as a group, we often had dinners up to four hours long because some dishes would take ages to freshly prepare. While initially confusing and somewhat frustrating, the benefit of this is that all your food is super fresh because they've literally made it just for you, just then. I would suggest however, that you be aware of this and to not become frustrated when your meal, or drinks for that matter, seem to take FOREVER to come out to you. In Uzbekistan, things happen on Uzbek time. 

Spices at the market. Uzbek food is based on lots of fresh, locally grown ingredients, flavoured with various spices and generally lots and lots of dill.
I'm so deeply obsessed with Uzbek tomatoes - these ones were at a market in Tashkent but the whole country had exceptionally tasty ones. Would definitely recommend eating many, MANY Uzbek tomatoes.
Because it's a little off the beaten track, it's still 100% possible to take lots of pictures around Uzbekistan without anyone - tourists or locals - in them, which is kind of insane given the beauty of the sights!
When should I visit?
Uzbekistan has two very distinct seasons, summer and winter. It's advisable not to visit at the height of either, because in the summer it is well and proper hot and in the winter it's rather cold and frozen. I visited in late June, which I thought was ideal, though I am accustomed to warm, dry summer heat. I enjoyed beautiful, cloudless summer days and warm and lively summer nights, so I thought my choice of time to visit was perfect, but if you like it a little less intense heat wise, then I'd suggest visiting in May or September to catch the less intense warm weather.

How do I get around the country?
Being on a tour as I was, I had all my transport prearranged, which was highly convenient. I mostly travelled on a private bus but there was one overnight train journey too. If you opt to freestyle things, the good news is that there are intercity trains between all the major Uzbek cities and the trains are definitely decent, so that's a good way to get around. Taxis are super cheap too, which makes navigating around the cities themselves very easy. In Tashkent there's a metro which I'd suggest going for a ride on just because the stations are works of art and shouldn't be missed, even if you don't actually need to go anywhere in particular!

Head full of dreams and a heart full of wild wonder; twirling in one of Samarkand's many elaborate arches.
The wooden columns of Bukhara's Bolo Haouz Mosque.
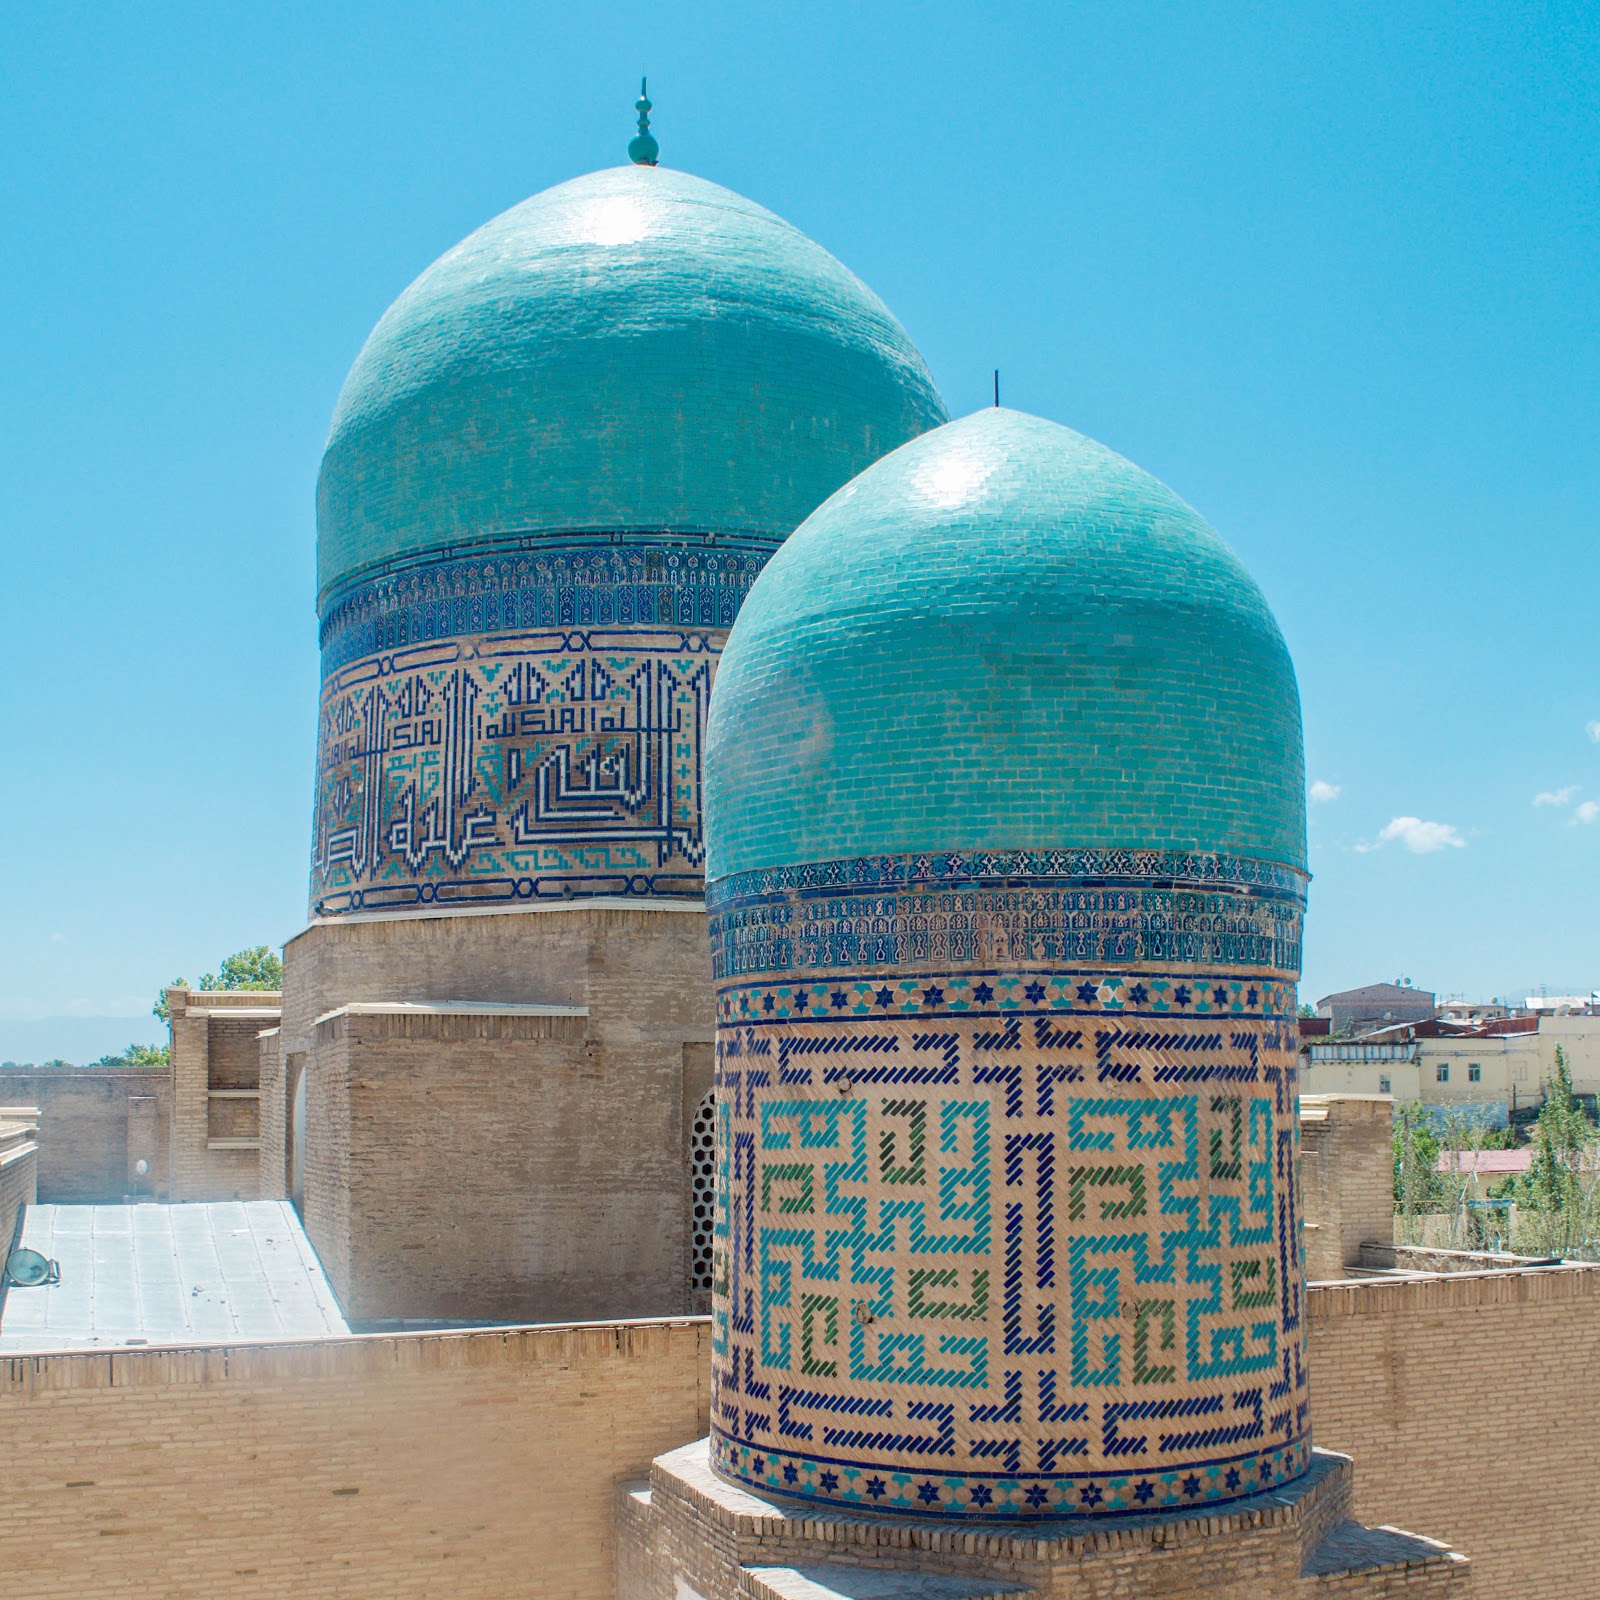
Blue and turquoise domes are literally everywhere in Uzbekistan and you damn well bet I took 6,003 pictures of all of them!


This post is entirely unsponsored and every opinion shared in my own, formulated through my own personal experience travelling through Uzbekistan.

Thursday, 24 May 2018

Salted Caramel Chia Pudding Pots.


Most people meal-prep lunch and dinner, but I am not 'most people'. No, you see I'm all about meal-prepping breakfast because you damn well bet those extra 15 minutes snoozing in bed in the morning make my day oh, I dunno, INFINITELY better than it would have been had I needed to get up earlier to make, of all tedious things, breakfast.

I've never been an alarm snoozer, but I have always been a girl who values maximum time spent sleeping over most other things. This means that I will always set the alarm for as late as is humanly possible to do so while still being at work on time. I'm actually so skilled at doing this now that I'm quite the morning ninja if you will, entirely capable of fully getting up, dressed, fed, make-uped, hair done, teeth brushed, tea drunk and out the door within a 20 minute window. This my friends, takes considerable skill. It also takes some sneaky breakfast meal-prep, which is where this particular recipe comes in to save the day (literally).

These little pots of morning goodness are;
          - Nutritious (thanks to all that fibre, omega-3 and protein in the chia seeds)
          - Easy to make (thanks to the only real 'prep' being the need to quickly blend, stir and put in the fridge overnight), and, MOST IMPORTANTLY,
          - TASTY (thanks to all that PB and gooey medjool date caramel-ness).

All in all, they're kind of amazing and yes indeed they've saved my morning hustle many a time. My boss, though she doesn't realise it, very much owes my presence in her office on time as expected to these Chia Pudding Pots, thereby making these guys the real MVP around here!


Ingredients;
1 cup soy milk
3 medjool dates (pitted)
1 tbsp peanut butter
3 tbsp chia seeds
Handful raspberries
Handful granola

1. Add the soy milk, pitted medjool dates and peanut butter to a blender and mix on high speed for a minute or two, making sure the dates are fully broken up and there aren't any chunks in the mixture.
2. Take a bowl and put the blended caramel milk mixture into it. Add in the chia seeds then stir well.
3. Place in the fridge for a few hours.
4. Take some small, airtight containers and add some raspberries into the bottom, roughly mashing them with a fork. Scoop in the chia pudding on top, then seal the container and place in the fridge until you're freaking out one morning about being late for work.
5. In the midst of that morning freak out, remember past you was smart and meal-prepped for this exact scenario. Remove the Chia Pudding Pot from the fridge, sprinkle some crunchy granola on top and enjoy.
6. Despite your sneaky sleep in, turn up at work on time anyway thanks to your meal-prepped breakfast and proceed to smash out a wicked day in the office/workplace, all thanks to a humble Salted Caramel Chia Pudding Pot. Magic!

*this makes 2-3 chia puddings, depending on the size of jar you use!)


Cinnamon and Raspberry Pastry Knots.


For a while now I've been thinking about making some more quick, simple and easy snacks that would be suitable for a casual afternoon tea, to gift to a friend or otherwise to consume in their entirety on a rainy afternoon when you're home alone and there's no one around to give you judgmental side eye about you uncontrollable love of pastry.

Enter the Cinnamon and Raspberry Pastry Knot.

These little morsels are the PERFECT thing to quickly whip up and I can guarantee that if you do exactly that, everyone will be highly impressed with your skills and will definitely think you've far more culinary talent than you actually do. You only need 5 ingredients to make them, they're SUPER tasty and genuinely super quick and easy to whip up.

They taste best when fresh, though will keep well in an airtight container and zapped in the microwave for approx. 20 seconds the following day. I can confirm, by way of rigorous testing (N.B. voraciously eating them), that they're also particularly pleasant with a hot cup of tea, curled up under a blanket on your couch when its raining/trying to snow outside. Basically you need them in your life as a matter of urgency and good taste.


Ingredients;
4 square sheet puff pastry, thawed (In Australia, the brand 'Borg's, available at Woolworths, is dairy free)
1/2 cup coconut sugar
2 tbsp cinnamon
4 tbsp raspberry jam (I make this myself using 1 cup frozen raspberries, 1 tbsp chia seeds and a splash of water mixed together and cooked on low heat in a saucepan for 5 mins, but if you're lazy you could use regular supermarket jam)
Dairy free butter (I use Nuttelex)

1. Preheat your oven to 180 degrees Celsius (fan-forced).
2. Take a square sheet of pastry and butter it like you would a piece of bread, then spread 1 tbsp raspberry jam over the top of that.
3. In a small bowl, mix together the coconut sugar and cinnamon, then sprinkle that generously over the square of pastry.
4. Cut the square of pastry into thirds, then fold each third in half (you should end up with strips approx. 2cm wide and 20cm long). Pick the strips up and twist them into spirals then loosely twist them into a knot. Evenly space the knots on a lined baking tray, then sprinkle them with some extra cinnamon/sugar mix.
5. Repeat for each square of pastry, then bake for approx. 20 mins or until golden brown. Enjoy with a cup of tea and the satisfaction of being an undercover pastry chef!!


Friday, 11 May 2018

Rainbow Funfetti Doughnuts.


Around a year ago, after around a year of hunting, I finally located and purchased a doughnut pan. It was a very exciting day and there was a whole lot of anticipation for my first homemade doughnuts. It's perhaps because of that anticipation that my first, and indeed second and third attempts at homemade doughnuts, were bitterly, heartbreakingly, traumatically, et al UPSETTING IN THE EXTREME. Those initial attempts at doughnut making were gross and definitely got filed under the 'recipes gone wrong' tab. If I'm being totally honest, I have many the kitchen failure and they can all be disheartening but the doughnut baking failures were particularly sad because lemme assure you, it is genuinely utterly TRAGIC to eat a bad-tasting doughnut. It even pains me now to think back on the bad-tastiness of those sub-par doughnuts. Let's just not talk about that anymore. 

A few weekends back though, the Feng Shui about doughnut making was giving off some majorly positive vibes. In all honesty, this is how and why I get the idea to try most things in the kitchen - I just have to wait till the right vibes, or Feng Shui if you will, comes along. I'm so proud to declare, largely thanks to the good doughnut-related Feng Shui, that I have finally succeeded in making making good homemade doughnuts. They're light, they're fluffy, they're tasty, they've got rainbow funfetti sprinkles in them AND on them, and my faith is now fully restored in the kitchen, baking and doughnuts in general. 

I should disclose, that technically these probably ought to be called 'cakenuts' because they're really a hybrid cupcake-doughnut but I think we can all unanimously agree that the name 'cakenut' is weird, it probably all makes us a bit uncomfortable inside and it can go on the list of words we shall avoid using alongside 'moist'.

Nonetheless, whether they technically be a cupcake-doughnut or not, these are delicious, Homer Simpson would 100% approve of them and you should make yourself some asap!


Ingredients;

The Doughnuts
1/4 cup aquafaba (the liquid from a can of chickpeas)
1/2 cup coconut sugar
1/4 cup maple syrup
2 tsp vanilla bean paste 
3 tbsp coconut oil (in it's liquid form)
1 1/2 cups plain flour (I use white spelt)
1 tsp baking powder
1 tsp bicarb soda
1/2 cup soy milk 
1/4 cup rainbow sprinkles/funfetti

The Icing
1 400ml can full-fat coconut cream
1/2 cup icing sugar
2 tbsp maple syrup
1/4 cup rainbow sprinkles/funfetti

1. Preheat a fan-forced oven to 180 degrees Celsius. Before starting, I also grease my doughnut pan (so the doughnuts don't stick!) using some olive oil spray.
2. In a large mixing, combine the aquafaba, coconut sugar, maple syrup, vanilla bean paste and coconut oil using an electric mixer on high speed for a few minutes. You want things to be really well combined and for the mixture to become as light as possible (so don't be a lazy person and please actually do mix for several minutes otherwise your doughnuts won't be as good okay)!
3. When fully mixed, add in the flour, baking powder and bicarb soda, then fold the mixture through using a spatula/spoon until just combined.
4. Add in approx. half the soy milk, and continue to mix. Slowly add in the rest of the soy milk until the mixture is smooth and relatively runny like a regular cake mixture should be (you may not need all the soy milk!) and then give everything a final mix with the electric mixer.
5. Add in the rainbow spinkles/funfetti, then mix them through with the spatula/spoon.
6. Use a spoon to scoop out the mixture into your doughnut pan moulds. You should fill them approx. 3/4 full.
7. Place the filled doughnut pan into the oven and bake for 20-25 minutes, or until lightly golden and firm to the touch.
8. Flip the doughnuts out onto a cooling rack and allow to cool fully before icing.
9. To make the icing, take a small mixing bowl and scoop the solid part of the coconut cream out into the bowl (I suggest leaving the coco cream in the fridge overnight to best separate the liquid from the solid and to get the best icing consistency). Add in the icing sugar and maple syrup, then use an electric mixer on high speed to mix things for a solid few minutes. For best results, I recommend making the icing the day before the doughnuts and allowing it to sit in an airtight container in the fridge overnight.
10. When the icing is done and the doughnuts cooled, use a spoon/knife to ice each doughnut, then sprinkle each one with a generous amount of rainbow sprinkles/funfetti before having yourself a wee little doughnut party! Happy days!


Saturday, 14 April 2018

Sunshine Yellow Vegan Lemon Tart.


This recipe is a straight out miracle. For years I have fantasised about making a vegan lemon tart. However, it seemed wholly impossible given that your traditional lemon tart is kind of based around butter, eggs and cream. How then, and in what universe, is it possible to create a bonafide, authentically delicious lemon tart without such things?

The answer? With large amounts of PERSEVERANCE, and in this very universe we inhabit. (*fist pumps*)

This particular recipe is a literal labour of love. It's been years in the making, and oh my have I created and tasted some HORRIFIC concoctions in my quest to bring this baby into the world. It all started out with the base, which is kinda obvious given you can't make a tart filling unless you've got something to put it in. Anyways, obvious realisations aside, creating a tasty vegan tart pastry was not an easy undertaking. My first attempt tasted like nothing. As in no flavour whatsoever - it was weird. My second attempt, and my third, fourth and fifth, were all harder than a brick, which is, how shall we say...less than ideal. Then one day I had a breakthrough! The pastry was perfect! But then I forgot the measurements I used and we went back to a few more failed rock-hard pastry shells. And, that's only the damn pastry!

Next came the lemon filling, which was, quite frankly, a hot mess for several months of recipe trials. I tried various things, including cooking the filling, not cooking the filling, adding in some random things, taking out some things, putting a bit more lemon in, regretting that because things then got very sour very quickly, creating the perfect (!!) filling before realising I'd totally forgotten to put any lemon in (#fail) - you get my drift. Things were not going well. And then just a few short weeks ago came rock bottom. I'd been in the kitchen for a while messing about with various ingredients. I had successfully created a mixture that I believed could, dare I say, possibly be 'the one'. It was a bit runny, so I put it in a container in the fridge overnight to see if it would set a bit. The next morning I enthusiastically swung open the fridge door, got myself a giant dessert spoon from the drawer and delved into that jar of lemon filling. Queue instant REGRET. It. Was. Awful. Like, gagging, please have mercy on me lords of the culinary universe, I am so sorry to all food everywhere regret. I truly do not know how, but I had succeeded in single-handedly creating the worst tart filling, and possibly kitchen creation, like, EVER. I was so scarred that I couldn't bear the thought of even attempting to rectify my travesties in the kitchen for weeks. But then, like a pesky frenemy from my past, the need to make a vegan lemon tart came over me again.

I went right back to the beginning and tried a totally new approach that seemed somewhat ludicrous at first but so long as it wasn't anything remotely like the horrific attempt of the past, I would consider it a good day in the kitchen. I decided to use coconut cream as a base, and then flavour the bejeezus out of it with lemon so I ended up with a proper lemon tart rather than a coconut-lemon tart. And you wanna know something amazing? It worked! Like, legitimately it tasted delicious. There was just one minor issue. It was as white as snow, with not a hint of yellow to it, and I dunno, it just feels kinda wrong to have a not-yellow lemon tart.

So away I went mulling things over and then I had an epiphany! I could colour the tart yellow with a pinch of turmeric. ABSOLUTE GENIUS. It worked perfectly. So perfectly that I shall gift to the world what seemed impossible - a Sunshine Yellow Vegan Lemon Tart. I definitely look some very un-tasty hits for the team, but here we are, where all is well in the world (well, mostly well) and you betcha I'm doing the happy dance in my kitchen over this recipe!


Ingredients;

The Base
2 cups plain flour
1/2 cup icing sugar
125gm vegan butter (I used Nuttelex)
1 tsp vanilla bean paste

1. Preheat a fan-forced oven to 180 degrees Celsius. 
2. Take a large mixing bowl and put the 4 base ingredients in it.
3. Using clean hands, rub the vegan butter through the flour and icing sugar. It takes a bit of mixing, but eventually you should start to see things begin to form a dough-like mixture. Keep at it, mixing things through with your hands and working the butter and vanilla into the dry ingredients.
4. Eventually you should end up with a big ball of yellow dough that you can roll around in your hands without it sticking to you. If things are still sticky, add in a bit more flour.
5. Clean down a table top and sprinkle it with some flour. Take a rolling pin (I like to wrap mine in cling-film/gladwrap) to prevent sticking, otherwise more flour also works) and plonk your dough down in the middle. Gently roll it out into a large circle big enough to fit your tart tin (my tin is approx. 20cm in diameter).
6. Line you tart tin with some baking paper. (*see below for some tart tin tips)
7. Likely with some difficulty (apologies, not all things are easy in life), carefully lift the rolled out dough off the table top and transfer it into the tart tin. If the dough splits or tears, fret not, you can use leftover bits to fix things up. Alternatively you can skip the rolling part and just manually push the dough into the tin, but I like to roll it so I get a more even coverage. Make sure you have a fairly even thickness on the base and sides of the tin, then cut off any excess you have.
8. Use a fork to gently score the bottom of the tart.
9. Cover the unbaked tart with some baking paper and then put some baking weights into the tin so the dough doesn't rise in the middle. You can get fancy ball things from baking shops for this, but being the inventive student that I am, I just use some rice.
10. Bake the tart shell for approx. 15-20 minutes, or until the sides start to lightly brown. At that point, remove the baking weights and allow the tart to cook uncovered for a further 10 or so minutes.
11. Remove the tart shell from the oven when its lightly brown and the base of the tart is cooked, and not dough-ey to touch. Allow to cool before putting the filling in!

*I strongly suggest using a special tart tin with a base that you can push up from below/one that has a base that sits inside, although separate to the sides lest things get unnecessarily difficult when it comes to removal of tart from tart tin.

The Filling
1 can coconut cream (leave to sit in the fridge for a few days)
Rind of 2 lemons, and juice of just 1
3 Tbsp maple syrup
1/4 cup icing sugar
Pinch turmeric

1. Take the can of coconut cream and open it. The can should have separated into a solid cream on top and relatively clear coconut water at the bottom - you only want the thick creamy part. Scoop the cream out into a large mixing bowl and set aside.
2. Grate the rind off 2 lemons, then juice just one of them. Put the lemon innards and outards (ain't that some terminology!) into a blender along with the maple syrup. Whizz that on high speed for a couple of minutes so that the rind breaks down into the mixture.
3. Add the lemon/maple mix into your bowl with the coconut cream. Put in the icing sugar then get out your electric mixer and go to town mixing that up for a few minutes. Things should get very nice, very thick and very creamy.
4. WITHOUT significant enthusiasm, add in a pinch of turmeric. Restrain yourself from getting too eager at this step otherwise you'll end up with a neon orange, weirdly tasting tart. You shouldn't be able to taste the turmeric at all because you've used so little - it's literally just for aesthetic colouring purposes.
5. Give everything a final mix together and when you're happy with the colour, scoop the filling out into you cooled tart shell.
6. Use a spoon to smooth everything over, then cover and leave in the fridge overnight.

The following day you should have yourself a delightfully yellow, deliciously sweet and tangy lemon tart. Serve it however you like (berries make an excellent garnish) and bask in the glory that you've created something that theoretically seemed impossible. Enjoy!!