Friday, 29 May 2015

Maintaining an Exercise Regime.

I've been thinking about writing this post for a while now because this is a topic lots of people always ask me about and if I'm entirely honest, exercise was the biggest reason that I not only lost weight, but that I kept that weight off. I've been in a solid exercise regime for 12 months now, which I'm extremely proud of because this is the longest period of time that I have ever maintained, and actually genuinely enjoyed, exercising. These days, I do quite a lot of running and people often see me either heading off (looking fresh as all heck) or coming back (looking not so fresh/slightly dying/very sweaty) and because people are lovely, they often encourage/compliment me and that truly feels fantastic, but it has taken a long time for me to reach the point I am at now. I thought I'd share a few tips that I learnt along the way because, if you do it right, exercising is actually a whole heap of fun, and, if you do things the right way, can be very easy and enjoyable to maintain.


1. You have to do something/find something that you genuinely enjoy doing.
I'd say that the fact there are thousands of people in the world trying to do exercise they hate and expecting it will work/they'll go the distance is surprising, but it isn't, because for a long time I tried (and failed) maintaining an exercise regime because I was forcing myself to do things that I hated. It's so funny telling people that this is my number one piece of advice because they either laugh, claim they don't have a favourite because it all sucks, or look at you like you're a moron because who in the world would ever actually enjoy running... Big confession here - I hate the gym. I cannot stand working out in gyms. So, I don;t go to the gym. Simple as that. Instead, I much rather to be outdoors, whether that be running by the lake, bike riding, or sometimes I go swimming. There's no doubt in my mind that if I forced myself into a gym to get my exercise, I would not be sitting here a year later telling you that I was still exercising. Find something you get enjoyment from doing and avoid forcing yourself into activities that society tells you are 'fun' or 'healthy' or 'good for you' because the reality is that if you don't enjoy what you do, there's a strong chance that you won't stick with it or you'll resent exercise and activity.

2. Variety is the spice of the exercising life.
This one kind of works hand in hand with point number 1 in that more often than not, if you do something every single day/every couple of days, etc and it is the same every single time, you will get bored. When you get bored, you'll find yourself not wanting to get up and get active and then next minute, you'll realise you've been binge watching Netflix for 3 weeks straight and haven't left your house aside from a trip to the supermarket to get some ice-cream. Whoops. I've been there my friends, and I have done that, and then I have dealt with that horrible guilty feeling you get afterwards. I don't think there are few many people in the world who can say they genuinely enjoy going for the same walk/run/ride at the same time, on the same days, week in, week out. That is why variety is fun and changing your routine is a good thing. 
My parents actually won this bike (who is called Gertrude the Green Bike). Shout out to them and their winning raffle ticket. Love ya!
3. Get Outside and Enjoy Some Fresh Air.
Following on from my gym hatred, I do not like exercising indoors. Now, it is quite possible that I am alone in that strong dislike and that's fine, but have you been outside lately?! Nature is so nice man! My friends used to laugh at me so hard when I would go all crazy about how cool and amazing and wow nature is (and by used to laugh, I mean they still do laugh) but I am just genuinely so amazed and I actually get so excited about being outside and being able to watch the sun rise or the leaves change colour in autumn or the weird duck-like bird things by the lake try and run away quickly when they cannot run very fast at all. I also like people watching, and being outdoors in new environments is a very good way to have a solid stalk. I have also worked out the schedule for the local mens rowing team. And when the good-looking boys run around the lake. Perks of being outside ladies. 
Here is a picture of me looking out over my kingdom deciding where I would like to build by dog palace.
4. Get your Friends in on the Act too.
If you're the only person you know that exercises, one of two things will happen. Number one, you might realise that you are amazing and become filled with your own self-importance and feelings of utter success, or, two, you will simply give up because if no one else is out and about exercising away, then why should you? Sadly, the second option seems to be the one that most people fall for, and the easiest way to stop that from happening is to get your friends up and exercising too. Go for a walk together, ride your bikes on a sunny afternoon, etc and have a good chat while you do it, catch up and enjoy the company of other people. Bonus here is that they'll likely thank you for getting them exercising too because exercise realises happy endorphins and usually after you've been active they'll be all happy and full of warm and fuzzy feelings that will make you feel good too!

5. Dogs are love. Dogs are life.
I am 150% a dog person. Just ask anyone I've ever spent more than five minutes with and I bet you they'll be able to tell you all about how in love I am with the doggie that lives down the street. if you don't love dogs, then please re-evaluate your life because you're doing something wrong. I love running with my dog for two reasons; one, I just like doing anything with a dog involved and two, she makes me run faster and that's always a good thing to have a bit of a challenge. Sadly, when I am at uni I don't have any dogs, but I have devised a genius plan to overcome this; I cleverly ask my friends who do happen to have dogs if they would like to go walking with me because basically what this means is that I am asking their dog on a date and then requesting that they third-wheel. It's a win-win situation because I get to see a dog and also catch up with my friends and also do some exercise because at the end of the day, the dog has to have a walk! 
This is my best buddy, Red the Dog who is very, very cute and my favourite running friend.
6. Don't Burn Yourself Out.
Maybe about 6 months after I started regularly exercising I fell into a trap that seems to catch quite a few unsuspecting people - I got stuck in the mentality that if I didn't go every day, then the world would end. Obviously the world is not going to end, but it did take me a while to realise that some days you simply have to give yourself a break. You shouldn't feel guilty about taking a day off activity, which took me a while to get used to. Running every single day, every week of the year is just not a sustainable option. I have at least one day off a week where I literally do nothing. Sometimes I don't even get out of my pyjamas or leave the house. It's fantastic. But it also means that the day after rest-day, I have more energy and I get more out of the activity I do that day. Very few weeks I have a couple of rest-days all bunched together, otherwise referred to as a Netflix-week. Those weeks are so fantastic I tell you. Give yourself a break every now and then and always be careful that you don't do too much, too soon, too often.


Friday, 1 May 2015

Apple, Almond and Peanut Butter Granola Bars.


I have an obsession with oats. It's probably not very normal to have such an obsession, but it is what it is, so I'm just going to call a spade a spade, admit my obsession and run with it. There are a few reasons why I love oats so much which I'm going to share and you never know - next week you may also find yourself in the beginning stages of an oat-session.

Oats are cheap.
This is a very important point to note because I, like many people in the world, do not own a money tree. I am also a university student and in theory the money I have should be spent on uni things like textbooks and pens and what not. Now, in practice this doesn't exactly eventuate because I like clothes and shopping, and less so textbooks. I also like food (wow I know, shocking revelation!) and therefore often find myself in a supermarket, buying oats. Because oats are cheap, I can buy lots of them and therefore I can eat them often - win win.

Oats are insanely versatile.
Did you wake up one day and feel the sudden and inexplicable urge to put some oats and some almond milk in a bowl and see what you'd get? Well, if you did, I'm pleased to say you'll end up with some delicious overnight oats. Did you wake up the next day and feel the need to put some oats and some coconut oil on a baking tray and put it in the oven and see what you'd get? Good! You've just made granola. Alternatively you may have been griped by the need to put some oats on top of your smoothie, or...maybe even in the smoothie?! Wow. Versatility is king. Oats are king.

Oats are nutritionally fantastic.
Now, I'm no scientist but according to people much more scientifically gifted, oats are nutritionally very good for you. Oats contain more fiber than any other grain which is good for the digestive system, helping you to feel fuller for longer and getting the need to rampage the fridge less often. Oats are also good for lowering cholesterol and they're full of plant protein which has been proven to be of equal value to animal protein (WHO). Personally, I have interpreted these fun facts as reason to consume even more oats than before, further fuelling my oat love.

Finally, oats are delicious. They go with basically everything and if you hadn't worked it out yet, I love oats. I took this love and I decided to add a few more of my favourite things and I ended up with some delightfully sticky and insanely delicious granola bars which have a very short lifespan because yes, I am eating one right now (and have been munching on them all morning....whoops!).


YUMMMMMMMMMM.

Ingredients;
(makes 8 bars)

1 1/2 cup rolled oats
1 cup diced dried apple (or other dried fruit of your liking)
10 medjool dates (pitted)
2 tbsp pure-state peanut butter
3 tbsp rice malt syrup
1 tbsp hot water
2 tbsp pure apple sauce
1/2 cup almonds

2 tbsp coconut oil (melted)
2 tbsp pure maple syrup
2 tbsp raw cacao powder

1. Blend the pitted dates and tbsp hot water for about 1 minute, or until a dough like consistency forms. There should still be small chunks of date, but when rolled, the mixture should form and hold a ball shape.
2. In a bowl, mix the date 'dough' with the peanut butter, rice malt and apple sauce until well combined. To the bowl, add in the oats, dried apple and almonds and stir well. The mixture should be quite thick, although everything should be well coated and when pressed together, stick and hold.
3. Take a slice tin and line with baking paper/parchment. Spoon the mixture into the tin and press down really well, especially in the corners and edges. Place in the fridge for an hour or so to firm up.
4. While the bars are in the fridge, take a small bowl and add the coconut oil, maple syrup and cacao. Place the bowl in a ledger bowl that has some boiling water in it to prevent the coconut oil from solidifying again. Stir this really well to make a raw chocolate drizzle.
5. Remove the bars from the fridge and use a sharp knife to slice them into 8 equal-sized bars. Take the cacao sauce and drizzle it generously over the top of the bars.
6. Test your willpower out by seeing how long these last in the fridge in an airtight container. I'm going to bet it isn't very long at all if you're anything like me!

(n.b. If serving to children, I would recommend using some baking paper/parchment and twine to make some cute little packing as I have done in the pictures because these bars are quite sticky and nobody likes sticky messy little fingers making sticky little messes all over everything!)


Thursday, 16 April 2015

Chocolate Cupcakes. 


Vegan baking can be a bit of a minefield. When you remove the conventional eggs, sugar and milk from a cake mixture, you can end up with a right mess. I won't lie, there have been several times that I've attempted to bake a vegan cake and I've ended up with a thick, tasteless catastrophe. However that is certainly not the case with these chocolate cupcakes! These bad boys are incredibly light and fluffy, full of chocolate flavour, very easy to make and, absolutely delicious.

I decided to set myself an additional challenge when making these - they had to be refined sugar free. I try and keep all types of refined and processed food in my diet to a tight limit, but refined sugar is the one thing I try to limit the most. Sugar is absolutely everywhere these days meaning that it is extremely hard to avoid. However there are more than a few types of completely natural sugar, which means it isn't difficult to keep my sweet tooth happy!


Ingredients;

The Cupcakes
100gm vegan butter (I used Nuttelex)
1/2 cup raw coconut sugar
1 1/2 cups wholemeal spelt flour
2 heaped tbsp raw cacao powder
2 tsp baking soda
1 1/4 cup unsweetened plant milk (I like to use almond or coconut)

1. Preheat a fan forced oven to 180 degrees Celsius.
2. In a mixing bowl, beat the vegan butter and coconut sugar with an electric mixer until it is light and fluffy.
3. Add in the spelt four, cacao, baking soda and plant milk and mix using an electric mixer unit everything is really well combined.
4. Take a muffin tin and line it with patty cases. Fill each case with the muffin mixture. (I wanted mine to rise quite a lot, so I filled them to the rim, but this will just depend on how big you want the cupcakes to be!)
5. Bake for approx. 25 minutes When cooked, a skewer inserted into the middle should come out clean.
6. Allow to cool while you make the icing.

The Icing
1 ripe avocado
2 tbsp raw cacao powder
3 tbsp pure maple syrup (agave also works)
1 tbsp plant milk (I used unsweetened almond milk)

1. Halve the avocado and scoop the insides out into a blender with a spoon. Add in the cacao, maple syrup and plant milk. Blend until well combined, makings sure to scrape the sides down.
2. Use a spoon to scoop the icing mixture into a piping bag and pipe it onto the cooled cupcakes. Alternatively you could just spread it straight onto the cupcakes with a knife. I garnished mine with some crushed pistachio nuts and dairy free choc chips.
3. When iced, place in the fridge for half an hour to allow the icing to firm up. Store them in the fridge (that is if you don't eat them all straight up!)


Monday, 13 April 2015

Lemon and Lime Cheesecake.


This week when I was doing the groceries with my mum I saw a huge bin of limes for $2 a kilo and I thought to myself that was an absolute bargain. I have a great weakness for sales. I'm that foolish person who reads the word 'sale' and let's the consumer mindset pull me in and bam! I must buy. It is not an option.

So while mum was off with the trolley buying whatever food items we actually needed, I filled a big bag with limes and off I went. This all worked fairly well until we got to the checkout and mum was like 'Rebecca, why do we have so many limes? I didn't put these here...' And, being all on the spot and stressing out because the limes were on sale and I therefore simply had to have them, I blurted out 'cheesecakes! I'm going to make some cheesecakes with them mum!' Thankfully mum accepted this fairly poor excuse with only a slight raise of her eyebrows and I got the limes, which I might just add again, were an absolute bargain.

So the outcome of these events were that I basically had to make cheesecakes otherwise mum was never going to let me buy limes on sale again and that would be a literal tragedy. Obviously it is a great hardship to have to make then eat cheesecake, so I was really, really upset by this task....

I first made vegan cheesecakes a few months ago and since I've had a few more goes, which have all worked for me, but I kept thinking there was something missing. And you'll never guess, but it was the limes! Yay for sales!!!! Honourable mention must also go to secret ingredient apple which always leaves people baffled because these delicious little pieces of lemon and lime heaven taste nothing like apple which is kinda fun because when people ask how you made a cheesecake without any cheese, thereby making it vegan, and you say cashew nuts, they are pretty much always completely shocked. Adding in that the secret ingredient is in actual fact a humble little apple is like the icing on the surprise cake.


Ingredients;

The Base
2 cups pecan nuts
1 cup macadamia nuts
10 medjool dates (pitted)
1 tbsp virgin coconut oil (melted to be in it's liquid form)

1. In a high speed blender, combine all of the ingredients until you have a crumbly mixture that holds when you roll it into a ball. (If it doesn't hold, add a few more dates)
2. Take a square cake tin and line using baking paper/parchment. Tip the nut mixture from the blender into the lined tin and spread evenly, taking particular care to ensure the base mixture is level all over the tin. Press down with the back of a spoon and place in the freezer to set for a minimum of 30 minutes.

The Filling (i.e. Lemon/Lime heaven)
1 cup cashew nuts (soaked in water for minimum 3 hours, then drained)
1/2 cup coconut milk (the clear liquid part, separated away from the white, solid creamy mixture)
2 tbsp coconut cream (that solid white creamy stuff you separated away from the milk part)
Rind of 1 lime
2 limes, juiced
Rind of 1 lemon
1 lemon, juiced
1 peeled and cored apple (any variety works)
2 tbsp pure maple sweetener (agave syrup/rice malt syrup also work)
1 tbsp virgin coconut oil (melted to be in it's liquid form)
1 tsp pure vanilla extract

1. Take all of the ingredients above and mix in a high speed blender for approx. 4 minutes, or until the mixture is completely creamy and smooth with no hard nutty lumps. I had to scrape my blender down a few times to ensure the cashews were 100% blended.
2. Remove the cake tin with the set base from the freezer. Pour the filling mixture into the tin, before returning to the freezer. Make sure the tin is flat in the freezer otherwise you'll end up with a lopsided cheesecake. Freeze overnight.
3. When serving, remove from the freezer and allow to stand for approx. 10 minutes, to slightly defrost. Cut into pieces and serve with a dusting of lemon and lime rind and some fresh mint leaves.


(these will keep in the freezer for a few months I think but to be honest I don't actually know for sure because they've never lasted so long for me to test this theory...)


Sunday, 5 April 2015

Spicy Pita Pizzas. 


Here's a fun fact; I made these for my friend Em and she couldn't deal with the spice, so I'm going to issue a warning right here and now that if you don't like a bit of pizzaz in the food you eat, either be very light handed with the spice or make something else (obviously another recipe of mine, because you're here anyway, so what reason do you have to not?!).

That aside, the other members of the household loved these pita pizzas. They're super easy to make, full of delicious flavour and they're very good for you given they're full of creamy avocado, vitamin and mineral rich chickpeas and pine nuts. I was planning on elaborating on the pine nuts, but basically I'm just going to say that I absolutely LOVE pine nuts so anything containing pine nuts is already delicious in my opinion. These pita pizzas also look amazing, so they'd be the perfect lazy Friday night dinner to whip up when you're having a movie night with your friends and have them think that you're some kind of crazy masterchef when in actual fact you've only expended a small amount of effort.

I'm going to treat you to another fun fact; I actually super randomly had a dream the other right in which this recipe came to me. I tried it all out, did some experimenting and this is the end result. Now, if that isn't a cool story as to where the idea for spicy pita pizzas came from, then I don't now what would be!

Here's another fun fact; you should go make these. They're yum. And they're easy. And they're delicious. And, just do it.


Ingredients;
(makes 4 pizzas)

Avocado Sauce
2 avocados
2 cloves garlic (crushed)
1 handful fresh coriander (cilantro)
1 lime, juiced
salt and pepper

Roasted Vegetables
1 head cauliflower, broken off into small florets
1 can (400gm) cooked chickpeas
1 tbsp olive oil
2 tsp garam masala
1 tsp ground cumin
1/2 tsp chilli flakes
salt and pepper

4 pita breads
handful fresh coriander (cilantro)
handful roasted pine nuts

1. Preheat oven to 200 degrees Celsius.
2. Drain the chickpeas and pat down with some absorbent paper towel to get rid of any excess liquid. Take the cauliflower florets and chickpeas and spread them evenly on a baking tray lined with paper. Drizzle the olive oil over the vegetables and then add on the garam masala, cumin, chilli flakes and a garnishing of salt and pepper. Bake for 25 minutes. At 10 and 20 minutes, stir the vegetables around well, before returning them to bake. When cooked, remove and allow to slightly cool.
3. In a bowl, take the two avocados and mash them into a paste with a fork. Add in the garlic, 1 tbsp olive oil, lime juice and some salt and pepper (to taste). Take the coriander and chop roughly with a knife. Add the coriander to the avocado mix and combine well using a fork.
4. Take a pita bread and, using a spoon, dollop a large spoonful of the avocado sauce onto the pita bread. Spread the avocado evenly over the bread. Then, take some of the roast veggies and spoon them on top of the avocado. Repeat for the other pita breads. Serve with a generous garnishing of fresh coriander, roasted pine nuts, pepper and, if it takes your fancy, a drizzle of olive oil. *insert emoji of licking lips*


Tuesday, 24 March 2015

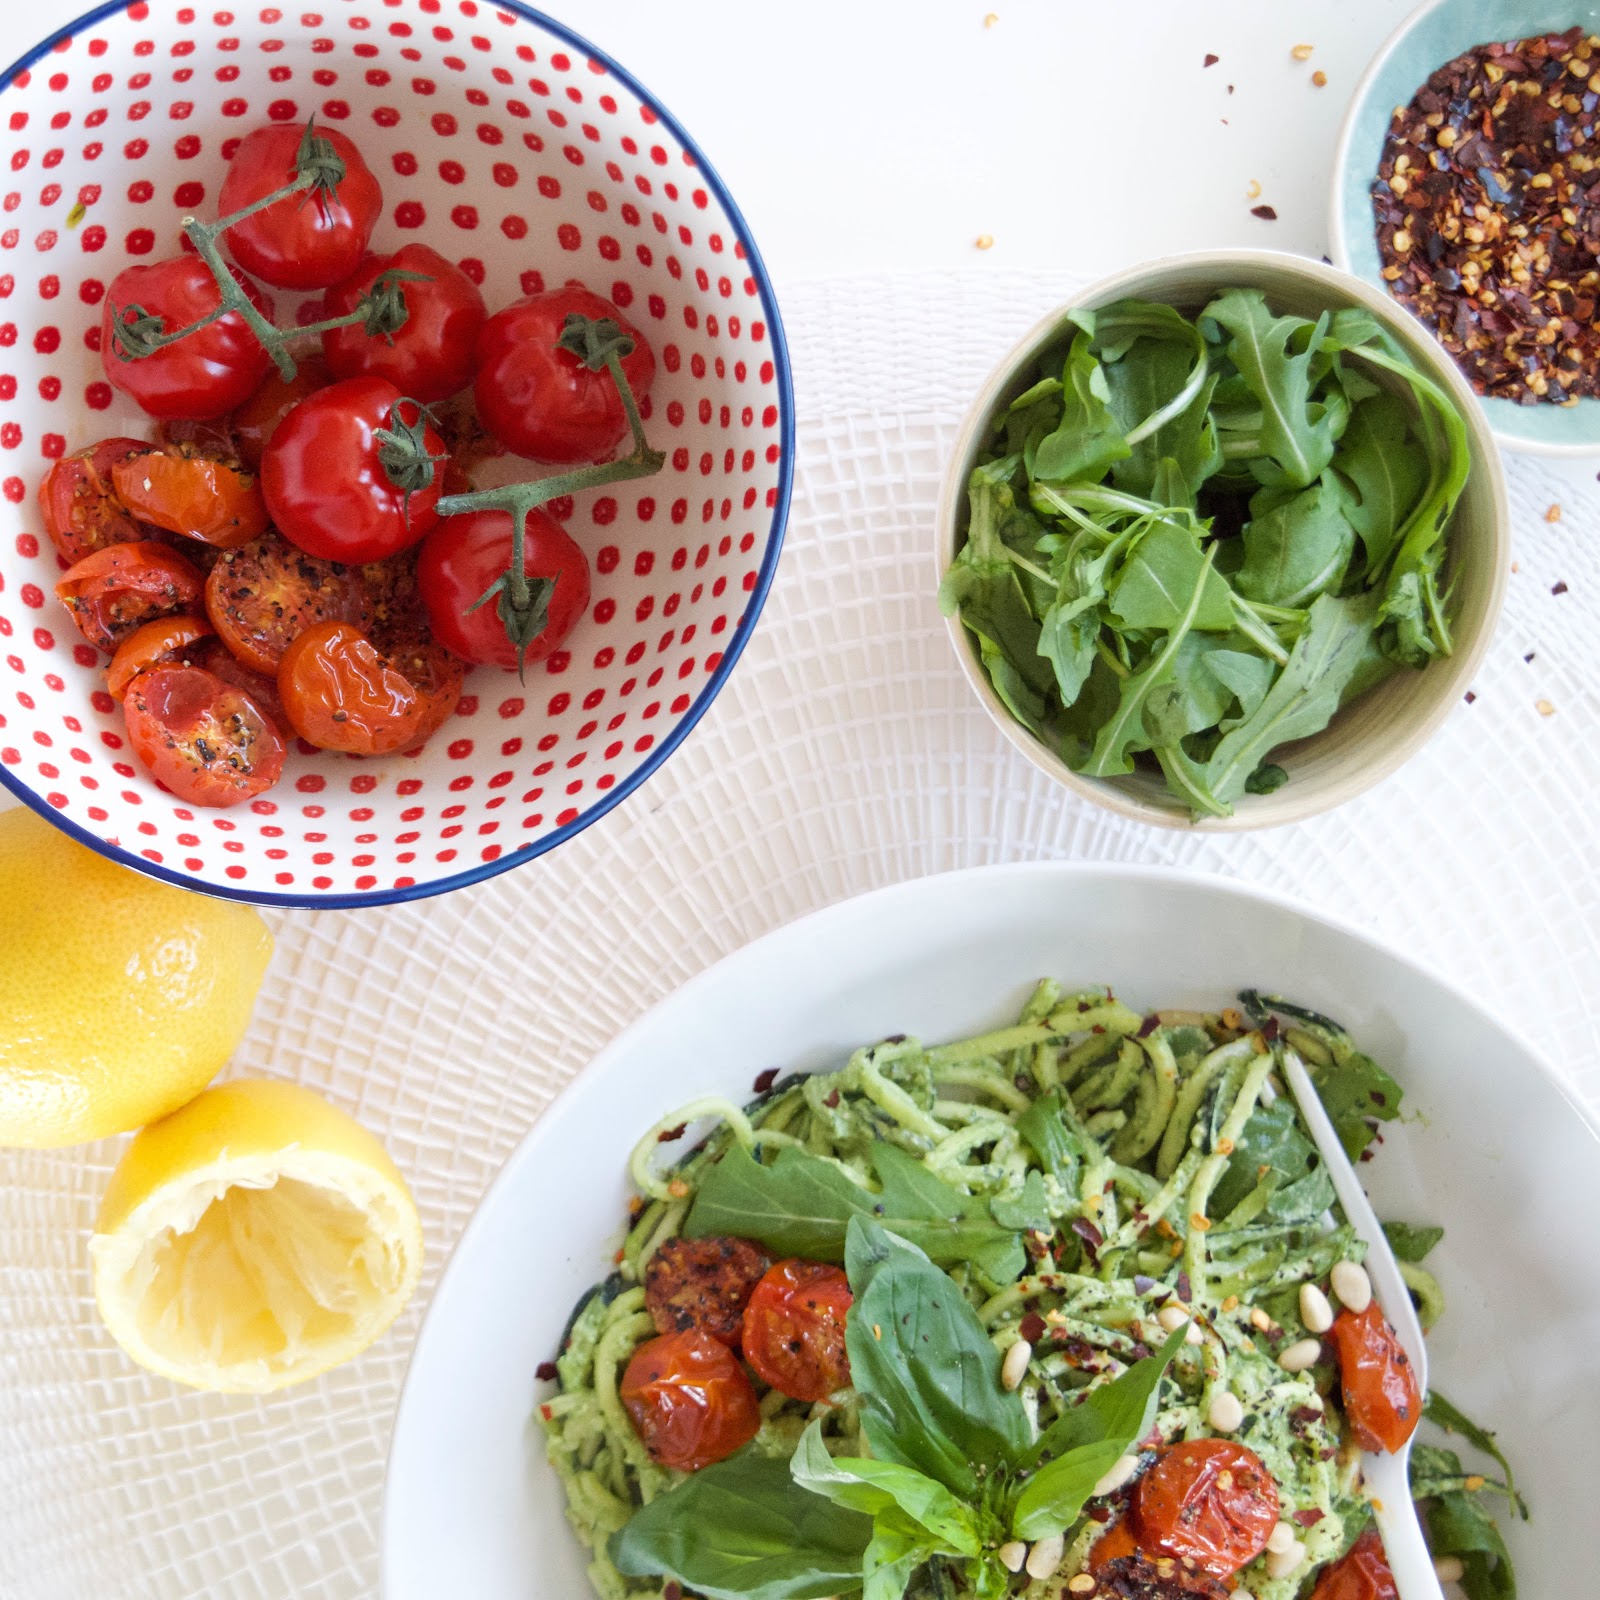
Avocado Pesto Zoodles with Oven Roasted Tomatoes.


This week (23rd - 29th March) is Meat Free Week, which is a worldwide campaign designed to get everyday, average people just like you thinking about the consumption of meat and products from animal agriculture. Scientific evidence conclusively proves that excessive consumption of meat and animal products is not only bad for your health, but its also killing the environment. High blood pressure, type 2 diabetes, heart disease, certain cancers, obesity - they've all been linked to human consumption of meat, dairy, eggs, etc.

In terms of the environment;

  • on average it takes 11 times more fossil fuel to make one calorie of animal protein than it does to make one calorie of plant protein (American Journal of Clinical Nutrition, Vol. 78, No. #, Pimentel & Pimental, Sep. 2003)
  • In the U.S., livestock production is responsible for 55% of all soil erosion on cropped land and pastureland, 40% of which ends up in water resources (United Nations Food and Agriculture Organization, "Livestock's Long Shadow", 2006, p. 73)
  • It takes 5 times more water to yield 1000 kcal of meat as it does to yield 1000 kcal of fruits, vegetables or grains (Malin Falkenmark & Johan Rockstrom, "Balancing Water for Humans and Nature", 2004, p. 50)
  • You could save more water by not eating one pound of beef than you would save by not showering for 12 months (based on 1, 7 minute long shower per day) (John Robbins, The Food Revolution, 2001, p. 237)

Personally I find these kinds of facts truly shocking, however none of this is to say you shouldn't eat meat at all, and MFW is not about promoting zero consumption of meat. But, as a population, humans consume too much meat that is frequently farmed in an unsustainable way, so the whole idea behind MFW is to get you thinking about that excessive consumption and to, hopefully, do something about it. I am personally a vegan, and very strongly believe in a vegan diet being the quickest, easiest and cheapest way to make a genuine beneficial impact on the planet. But, I recognise that many think veganism is a diet extreme, and that the majority of the world still consume meat, as well as other animal agriculture products. That's where Meat Free Week comes in, as it is founded on a desire to promote the realisation of that and encourage people to eat less meat, more fruits, vegetables and grains and as a result, be healthier and contribute towards helping our environment.

In honour of MFW, I thought I would share one of my favourite meat-free recipes that I love to eat for dinner. Zoodles are cool. If you've never heard of a zoodle, then you're missing out. Basically zoodle is short for zucchini noodle. You can buy a super fun kitchen contraption called a spiralizer (very fun, would recommend) or you could also use a conventional kitchen knife and slice a zucchini into thin strips. Basically no excuses. I should probably also mention pesto. And avocado. And pine nuts. And roasted tomatoes. All together. YUM.


Ingredients;
(serves 2)

2 large zucchini's
2 cups fresh basil leaves
1/2 cup raw pine nuts (+ extras for garnishing)
1 tbsp extra virgin olive oil + extra for the tomatoes
1 tsp minced garlic
1/2 avocado/1 small avocado, seed and skin removed
Half a lemon, juiced
1 cup fresh rocket (arugula) + extra for serving
Handful cherry tomatoes
Cracked black pepper
Chilli flakes (to serve)

1. Preheat your oven to 180 degrees Celsius. Use a sharp knife to slice the cherry tomatoes in halves, and then lay them out on a baking tray. Garnish them with a dash of olive oil and a generous sprinkling of black pepper. Roast for 20-30 minutes.
2. Meanwhile, using a spiralizer, turn the zucchini's into zoodles and place in a large bowl. (In the absence of a spiralizer, use a sharp knife to carefully cut the zucchini into thin strips, like fettuccine, or a julienne slicer if you've got one of those!)
2. In a blender, combine the basil leaves, pine nuts, garlic, rocket, avocado and olive oil. Blend these on high speed until you have a paste like consistency - this might take a few minutes and require some scraping down of the sides of the bowl.
3. Add the pesto to the bowl of zoodles and mix through well.
4. When the tomatoes are cooked, remove them from the oven. Plate up the pesto zoodles and serve with a generous topping of roast tomatoes, some fresh rocket leaves and some pine nuts as well as some chilli flakes. An extra handful of fresh basil leaves also doesn't go astray at this point.
5. Devour and appreciate the deliciousness of your completely meat-free, vegan creation of yum!


Monday, 16 March 2015

Chocolate and Hazelnut Granola.


If you know me, you will know that I have two great food loves in my life; foremost, chocolate and more recently, granola. I have serious issues because when I am in the presence of either, I cannot control myself. To be honest, I think that this kind of uncontrollable, eat-everything behaviour is entirely justified because like, as if any sane human would ever voluntarily stop eating chocolate or granola?!

This weekend, I made something miraculous happen. I took these two, singularly fabulous things, chocolate and granola, and I turned them into one, absolutely astounding thing of such deliciousness that I literally cannot even use language to express how yum and oh-my-god wow that this creation is. And! As if the stars aligned and the higher powers that be smiled down upon me, this delicious chocolate granola is......HEALTHY! No refined sugar, no dairy, no bad anything, only 100% pure whole foods and nutritional goodness which means one thing - it is more than acceptable to eat the entire batch of this in one sitting!!!! Go on, make some. You know you want to!


Ingredients;

2 cups rolled oats (I use a gluten free variety)
3 tbsp virgin coconut oil (melted)
3 tbsp pure maple syrup
2 tbsp raw cacao powder
1 cup raw hazelnuts (roughly chopped)
1 cup dairy-free dark choc chips

1. Preheat a fan-forced oven to 180 degrees Celsius.
2. In a large bowl, combine the oats with the coconut oil, maple syrup and cacao. Mix this really well, making sure that all the oats are covered with the chocolatey cacao goodness.
3. On a large baking tray, spread the chocolate oat mixture. Cook this in the oven for approx. 8 minutes, then add in the halved hazelnuts, stir everything around, and cook for another 8 minutes or so. Make sure that you don't let anything burn, so keep checking in regularly.
4. Remove from the oven and allow to cool.
5. When fully cooled, mix through the chocolate chips (would recommend potentially unjustifiably large amounts of these). Store in an airtight container.
6. Tell your friends you've made healthy chocolate granola and that you would share it with them, but you ate it all already. They will most likely begin to consider you some kind of chocolate goddess from this point onwards.


Saturday, 14 March 2015

The Most Delicious Banana Bread Ever.


Of all the recipes on this site, this one is probably the one that I have personally made the most. It's been tested, tweaked, re-cooked again and again and again and I can very much confirm that it's a foolproof recipe. Why have I made it so much? Well, I like bananas. And when I say I like bananas, I really mean that I take it upon myself to put banana in everything and anything I can because banana is delicious. By default then, banana bread, which is so banana-filled that it even has banana in its name, its an all time fav. In actual fact, if banana bread is not your all-time fav then you're depriving yourself and I'd recommend making it your favourite because it is so good. In the words of Little Britain's Marjorie Dawes, facilitator of Fat Fighters, I love the cake! But more specifically, the banana cake/bread.

I literally dream about this banana bread - it is that damn TASTY. Alone, it's phenomenally delicious, though if you're feeling fancy, I also suggest serving it with some vegan butter, or if you're feeling particularly extra, some coconut yoghurt and stewed berries (the second of those options being one of my favourite breakfasts)! Take it to an afternoon tea to wow all your friends, make it on a lazy Sunday afternoon and keep it all to yourself - whatever you choose to do, if it involves this banana bread, I can guarantee that it'll be one very delicious time!!!


Ingredients;
(makes 1 loaf - I dare you to try make that last more than a day...)

1 3/4 cups self raising flour
3 tsp baking powder
1/3 cup coconut sugar
1 chia 'egg' (1 tbsp chia seeds soaked in 3 tbsp water for 5 minutes)
3 tbsp rice malt syrup/date paste (either option works well!)
1 tsp vanilla bean paste
3 very ripe bananas
1/3 cup plant milk (I used oat)
1/2 cup chopped walnuts

(optional add in - 1/2 cup chopped medjool dates)

1. Preheat a fan-forced oven to 180 degrees Celsius.
2. In a bowl, combine the flour and baking powder.
3. In a small bowl, mix the coconut sugar with the chia egg, rice malt syrup/date paste and vanilla  until well combined. Add this wet mixture to the bowl with the flour.
4. In the now empty small bowl, peel the bananas. Use a fork to mash the bananas really well, and then add the banana to the bowl with the other ingredients, along with the plant milk and chopped walnuts (and dates). Mix everything really well, making sure that the mixture is fully combined.
5. Take a loaf tin and line it with baking paper (parchment). Use a spatula to pour the banana mixture into the tin and smooth it over, making sure that the corners are filled and evenly spread. (I used half a banana as decoration on the top of mine, walnuts and shredded coconut also work well)
6. Bake for 60 minutes, although keep an eye out that it doesn't burn. If you insert a skewer into the bread, it should come out clean when the bread is cooked.
7. Allow to cool down, then serve! Store in an airtight container.


Thursday, 12 March 2015

Pasta with Rocket, Tomato and Capsicum.


For all my American readers, this recipe title probably doesn't make much sense. In discovering a love for cooking, I have simultaneously discovered some rather hilarious linguistic differences in the names of common food items, which seems to be particularly bad when it comes to fresh fruit and vegetables. Without realising until I sat down to write this recipe, I seem to have rather deftly managed to incorporate the vast majority of these two-name foods. In essence, that means that, out of respect for the large number of American readers, I shall try to translate my classic, bogan Australian English into American English so you too can share in the deliciousness of this pasta.

In other news, I love pasta. I grew up in a rural area in South-Western Australia that is world renowned for its rich Italian heritage. Basically that means that there is a lot of pasta. And not just any pasta either, I'm talking the actual, genuine, homemade quality stuff. I put this to the test when I travelled in Italy in 2013 and sure enough, my humble country hometown on the complete opposite side of the world has pasta equal to any that I devoured whilst in the motherland. But, whilst it may taste like heaven on a plate, the average Italian pasta dish has quite a lot of room to improve nutritionally. Obviously the nutritional value of a pasta dish varies greatly between the individual types, so not everything is 'bad' or unhealthy, but when you can create something equally as delicious as the real thing right at home and have that dish be packed full of fresh green, leafy vegetables, delicious whole, non-salty tomatoes and potentially even a homegrown onion, why on earth you'd opt for the restaurant version is a mystery to me!! Also, this has avocado, and that should be reason enough for making and eating this.


Ingredients;
(a very large serving for one, or two smaller servings)

2 cups uncooked penne pasta (I used egg free, gluten free pasta)
1 tomato
1/4 onion (Spanish or brown both work)
2 shallots (spring onions)
1/4 cup low-fat semi sun-died tomatoes
1/4 cup antipasto capsicum (peppers - I buy this in a jar from the supermarket, but you could also roast your own and add some olive oil)
1 cup fresh rocket (arugula)
1/4 cup pine nuts
1/2 avocado 
1 handfull coriander (cilantro)

1. Cook the pasta according to pack instructions. When cooked, drain and rise briefly in cold water to take the heat away from the pasta.
2. Dice the onion, tomato and shallots. Place in a large bowl along with the sun-dried tomatoes, capsicum, rocket, pine nuts and coriander. Add in the pasta and combine well.
3. Serve up in a bowl, garnishing with the avocado and some extra pine nuts and coriander.
4. Devour your handiwork and pretend that you're in the Tuscan hills watching the sun set from a rustic balcony. 


Friday, 6 March 2015

Apple Doughnuts.


I'm not really sure that this creation is deserving of the label 'recipe' because really it's more so an assembly of a few things with zero cooking involved, but I think it's too delicious to not share. Thiese doughnuts are a super fun creation, they taste delicious and they looks very impressive (which is super important obviously because keeping the Insta feed looking smashing is crucial). Apple doughnuts have become my go-t0 4pm snack at uni because they're quick, inexpensive to make and they are super yum1

When you say you've made apple doughnuts, I've found people look at you like you're either (a) some kind of culinary magician, or (b) lost the plot. I'm not quite sure what people imagine when you mention apple and doughnut together as a single entity, but I couldn't think of a more suitable name and if anyone tries to tell me these couldn't pass for the more conventional doughnut (in appearance), then they are lying.

Probably my favourite thing about this creation is how flexible it is. I'm currently obsessed with Mayver's spreads (available from Woolworths and Coles in Australia), which are basically pure state spreads - i.e. when it says 'peanut butter', it is literally just peanuts, no other add ins. They make lots of really fun ones like alone, cacao and coconut butter and chia spreads and crunchy peanut butter and pretty much my new goal is to try them all (which is absolutely no hardship!). You can put whatever you like on top of the apple depending on what you have lying about, what you feel like or however game you are to experiment. These doughnuts are also a super appealing and very healthy snack for children, which makes me wish I'd thought of these before I took a gap year working as a teachers assistant and nanny in the UK!

Ingredients;
(makes 1 snack sized serve for 1 person)

1 apple
(Mayver's) Pure peanut butter
(Mayver's) Almond, cacao and coconut spread (any kind of pure state, natural spread would also work)
Toppings (dried goji berries, shredded coconut, raw pistachio nuts)

1. This is so simple I almost feel like instructions aren't needed! Basically wash and core the apple. Then, slice it into pieces about half a centimetre thick so that you end up with doughnut shaped apple. Then, go crazy with your toppings! Yummo!!!